Micro Four Thirds Mount Technical Drawing and CAD

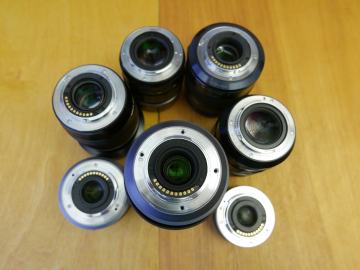
This post is dedicated to all you creatives out there, who just want a good 'ol reference lens mount for your crazy optical camera projects. Maybe you like attaching ball glass jars to your camera. Maybe you like the way stained glass looks in front of a lens. Maybe you really like Lens whacking. Whatever your optical interests, I made this post for Micro Four Thirds users who want to explore their own optical endeavors. Keep on making!
Sure, you can go out and buy the cheapest lens adapter for your camera mount and get away with some tape or glue, but you know it's not right. You can feel it's not right.
Unfortunately, inexpensive lens adapters tend to be made from the cheapest aluminum or magnesium alloy, and machined to the wrong dimensions. You will often find reviews of owners complaining of slop in the mount and lack of focus at infinity.
In all fairness, camera manufacturers do not make the lens mount dimensions of either mating gender known, instead, it has to be found out. This is frankly absurd and I am tired of this "walled garden" approach to business and manufacturing. Granted, I do not have to sign an EULA to buy or use a camera (I'M LOOKING AT YOU, EVERY SOFTWARE MANUFACTURER), but come on, just give us the mount CAD so we can play in our infinite sandbox.
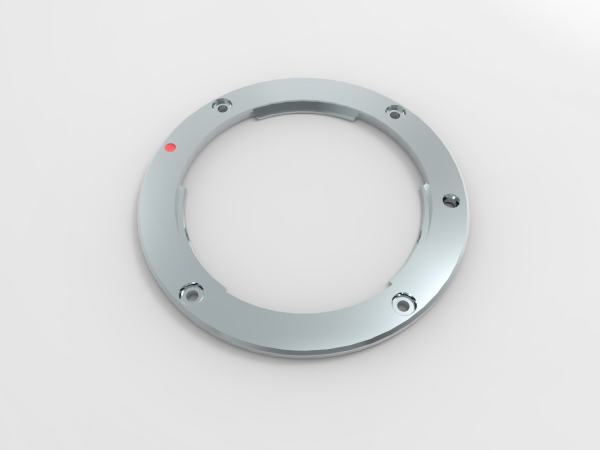
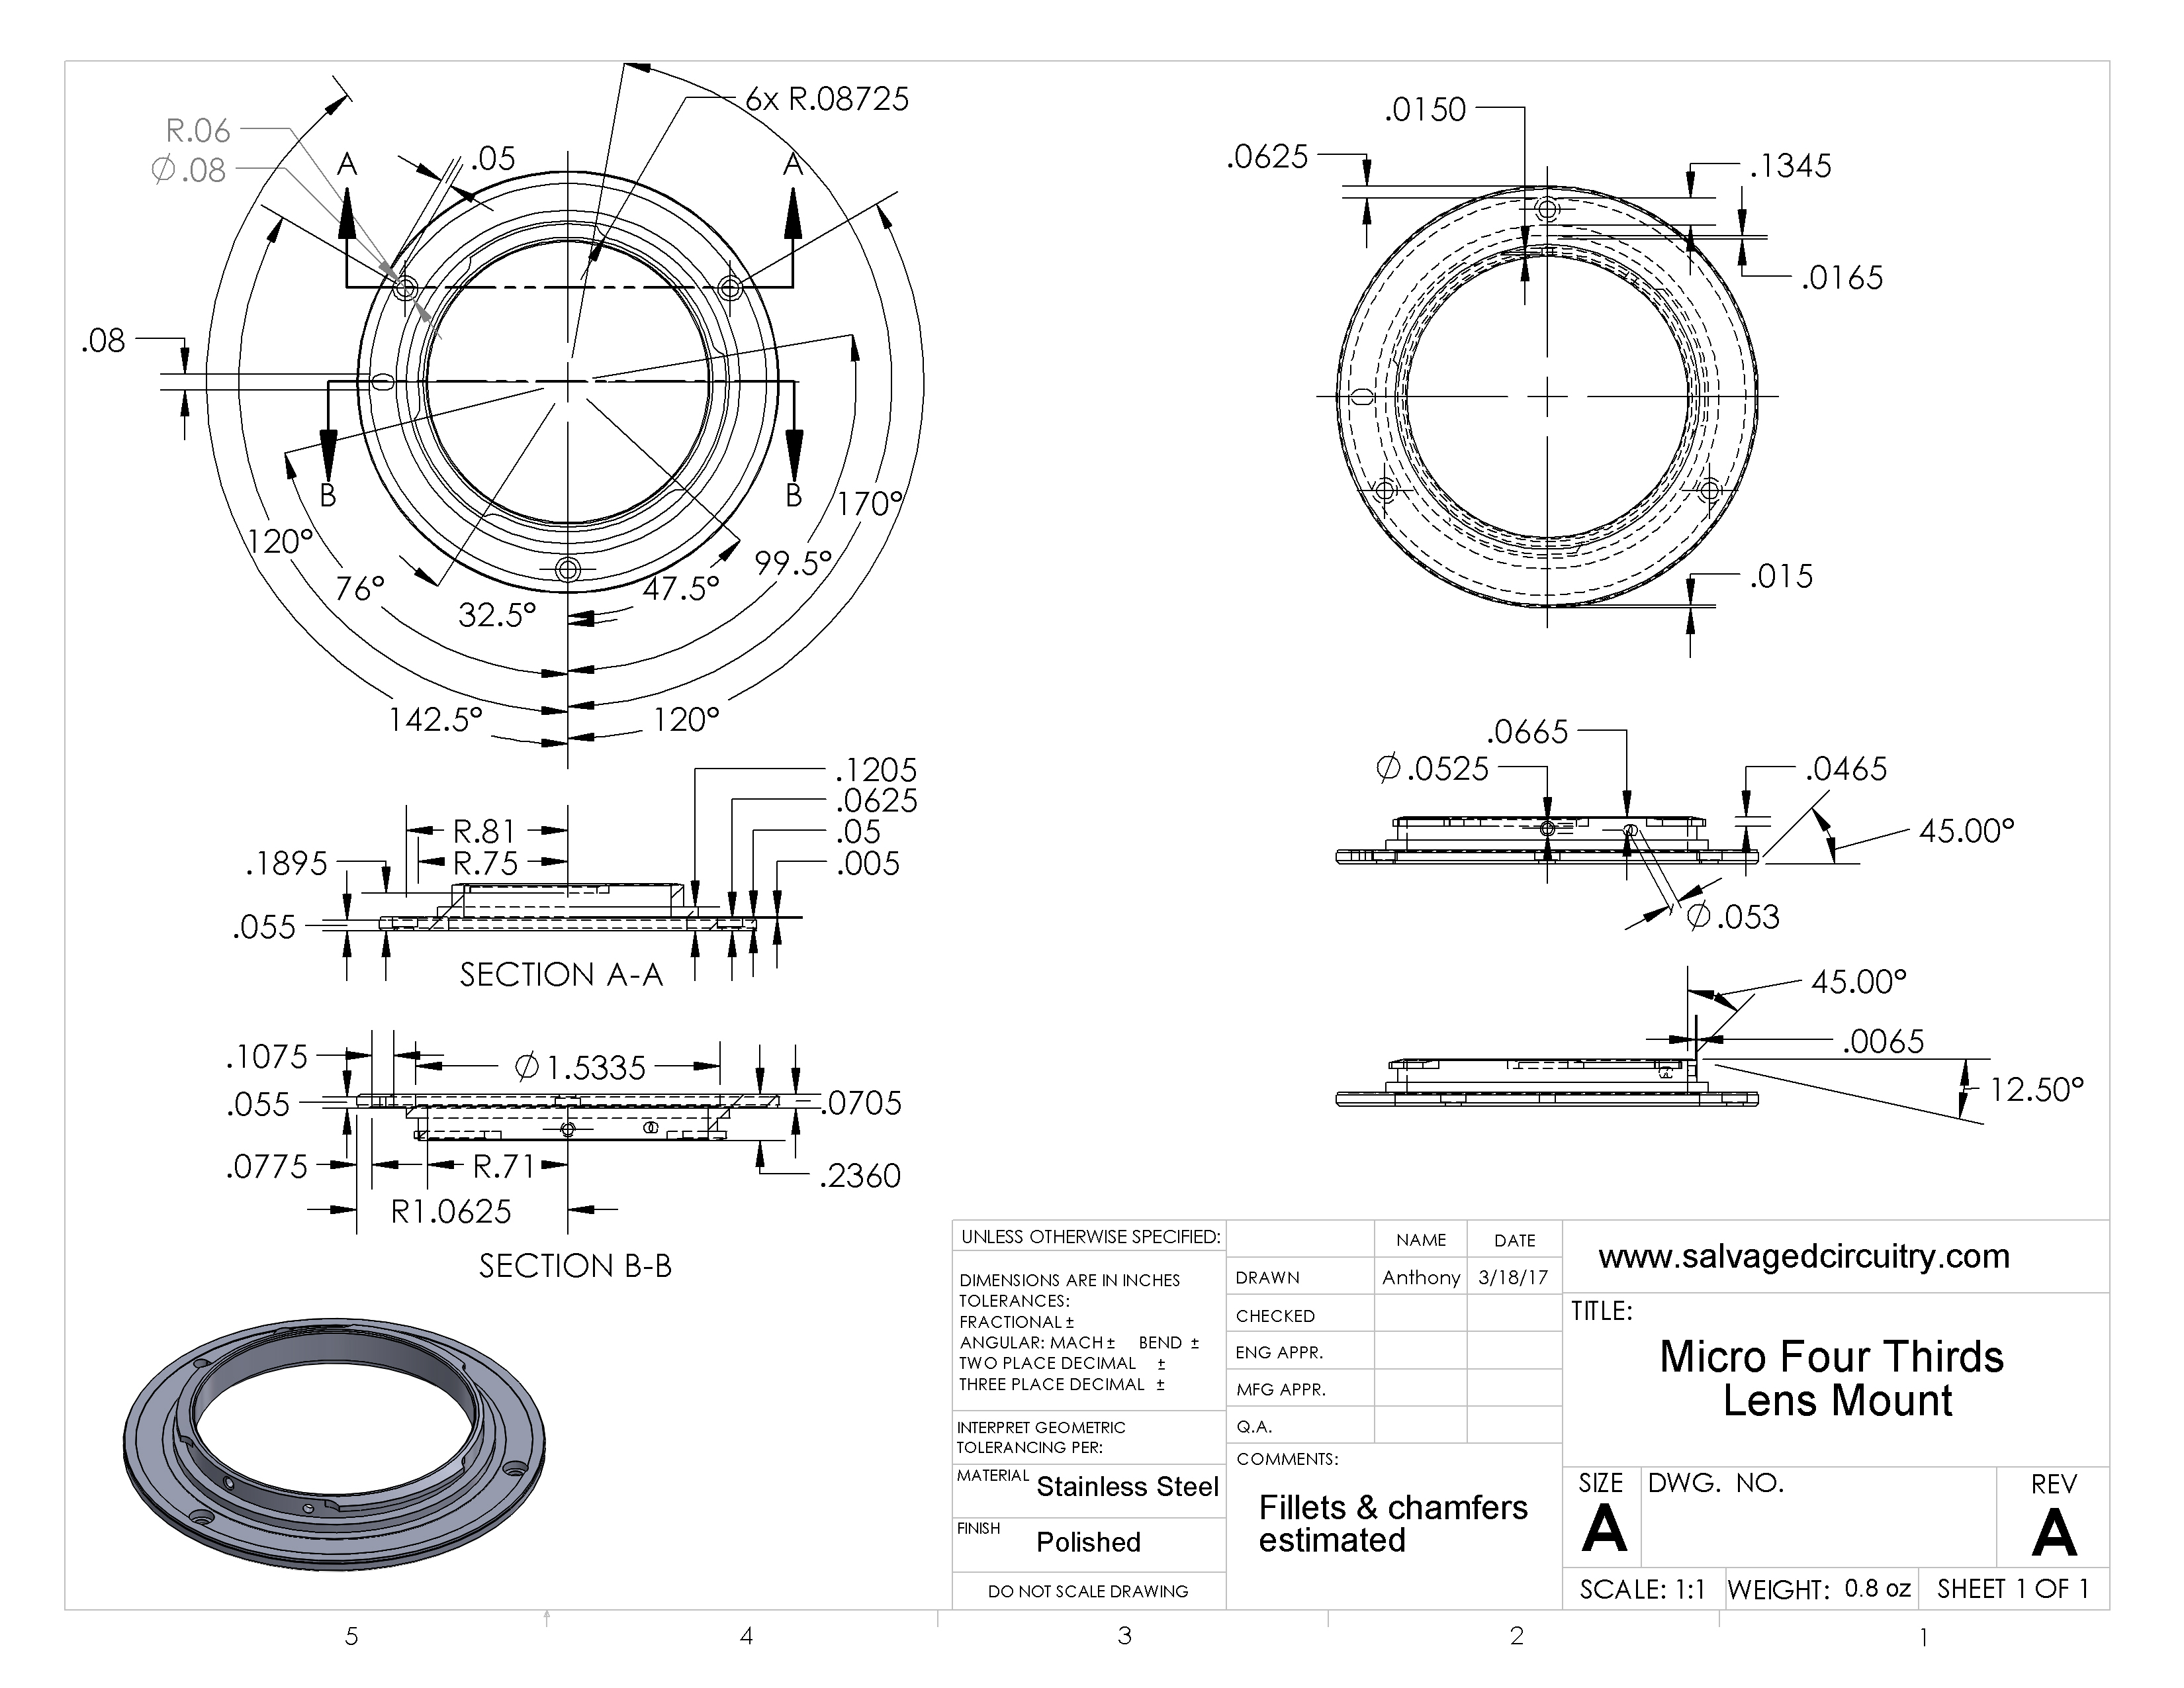
As you can imagine, I'm a bit flustered over this. So, I decided to do something about it. This is to all you creatives out there: Here is a CAD model of the standard Micro Four Thirds lens mount. This is the male portion of the mount that is attached to the rear of a Micro Four Thirds lens. Dimensions were taken from the lumix G Vario 45-200mm f4-5.6 lens mount, measured by myself and my trusty 4 decimal Mitutoyo caliper. The CAD was composed in Solidworks 2013. There are STL and IGS files available. The render was composed in Keyshot. The CAD files are available below and from Grabcad as well.
Micro Four Thirds Lens Mount CAD:
How Crazy am I? There are the technical drawings as well! So if you find an old school machinist whose better than using 1s and 0s, you're still covered. There are mechanical drawings in each zip file, and are also included on Grabcad. There were a lot of very fine dimensions and the spacing of dimensions on the 11x14 drawing space was quite limited. Forgive me, there are only so many 0.1in chamfers that can fit on a page ^_^.
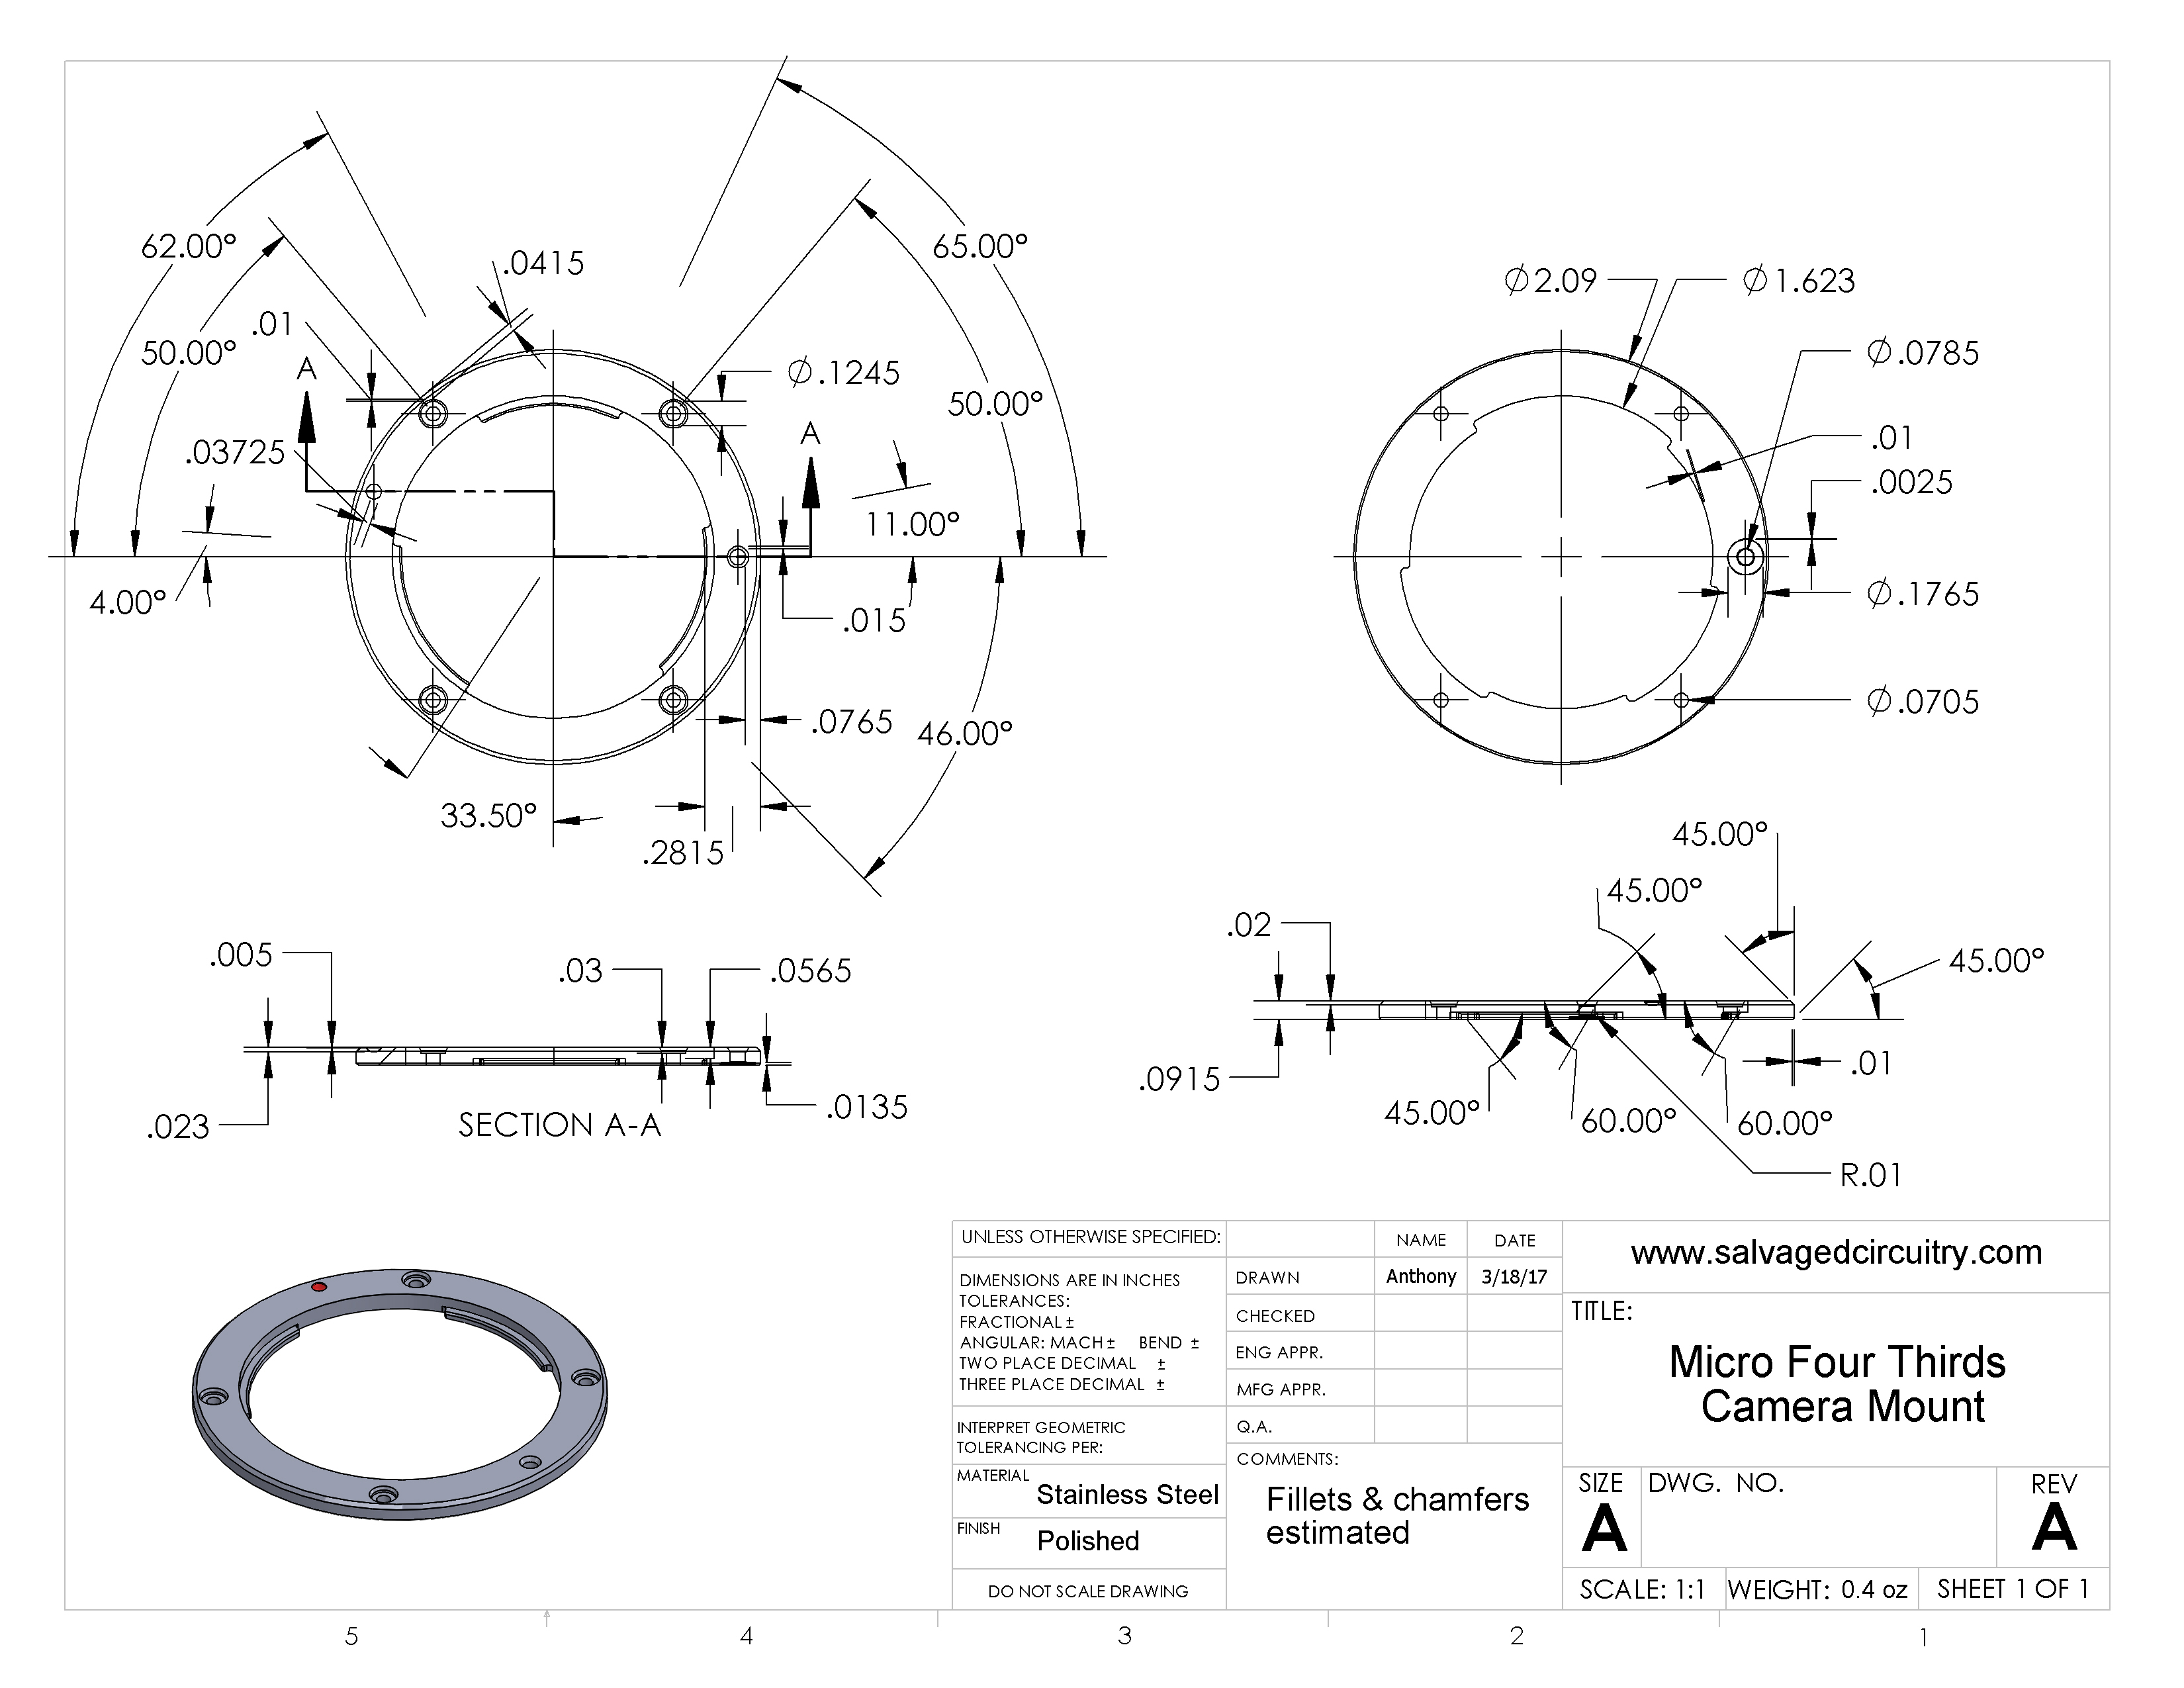
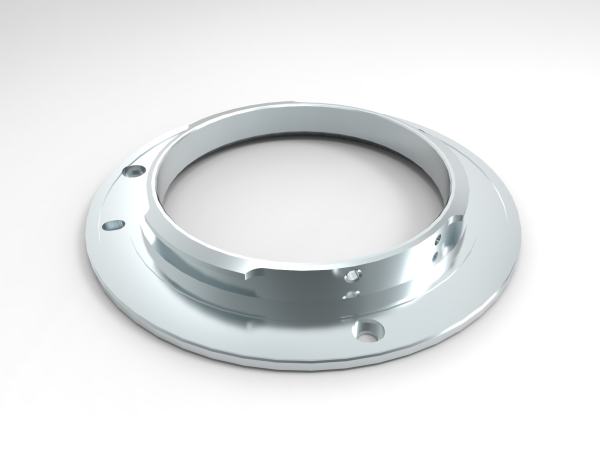
What's this? More? You think I'd leave you hanging homie? Here is the mating Micro Four Thirds camera mount, measured with the same caliper, to the same tolerances, available for download in Solidworks, IGS, Step, and technical drawing. Just like above, render done in Keyshot. The CAD files are available below and from Grabcad as well.
Micro Four Thirds Camera Mount CAD:
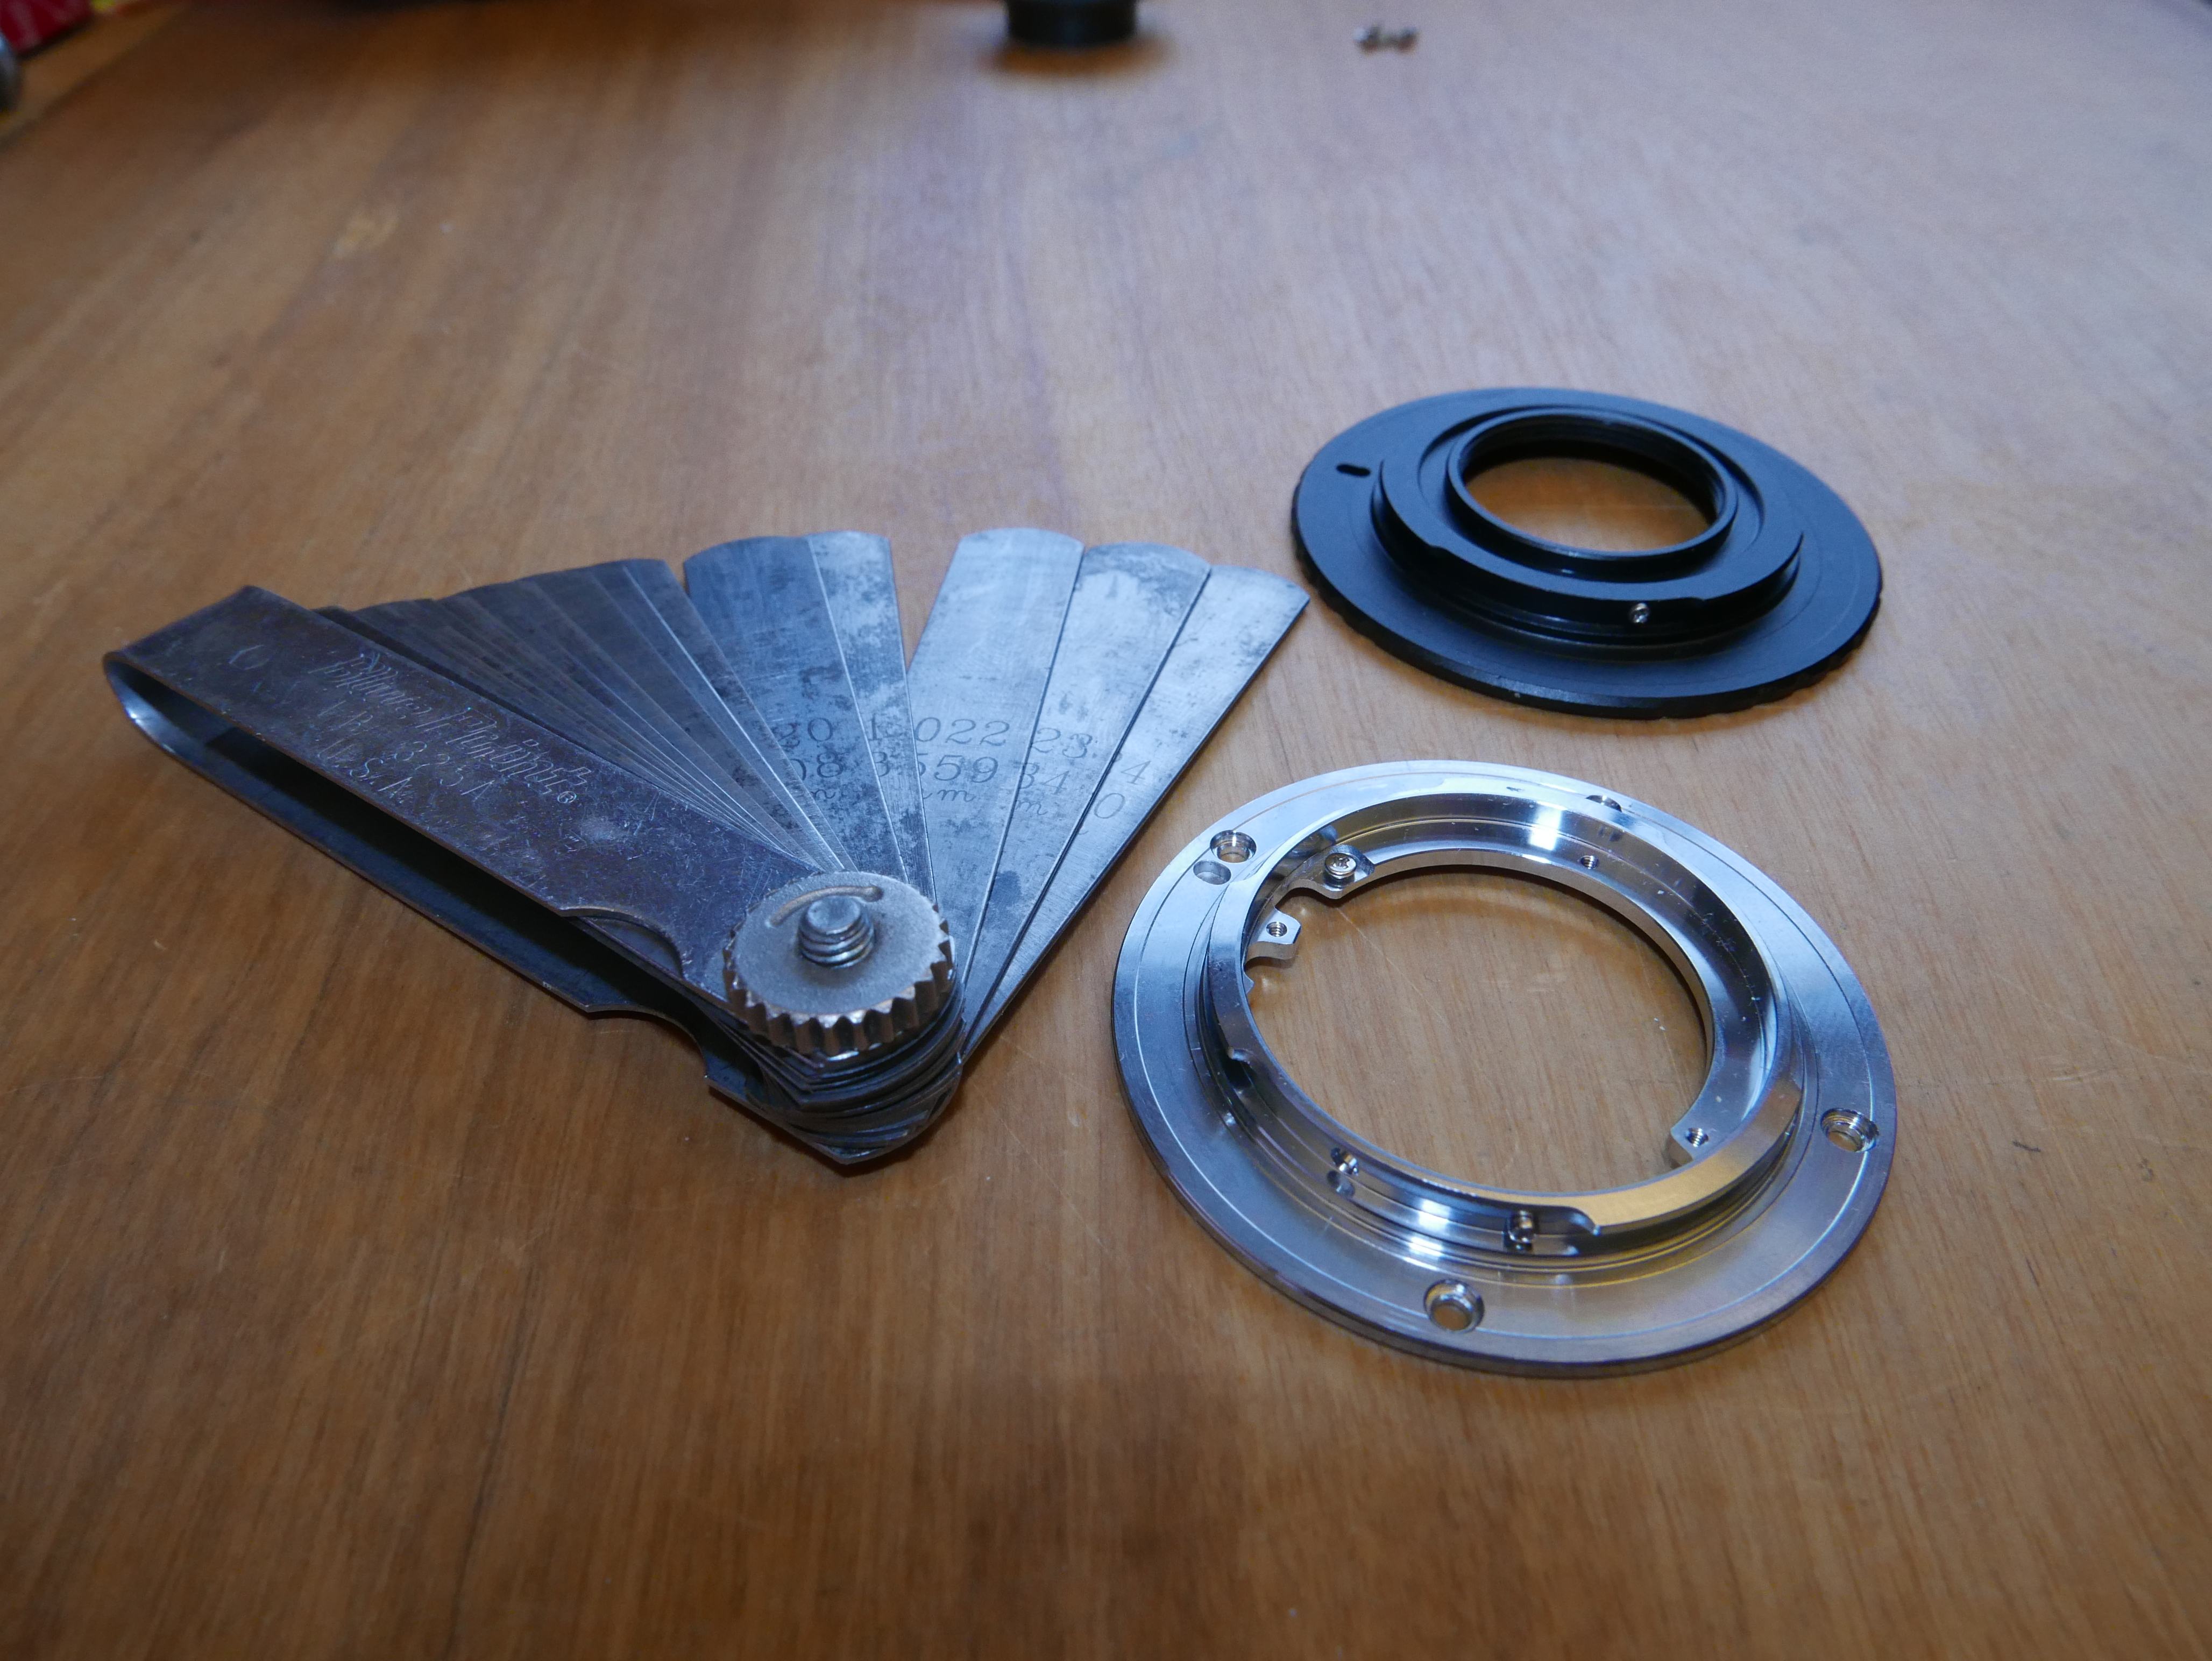
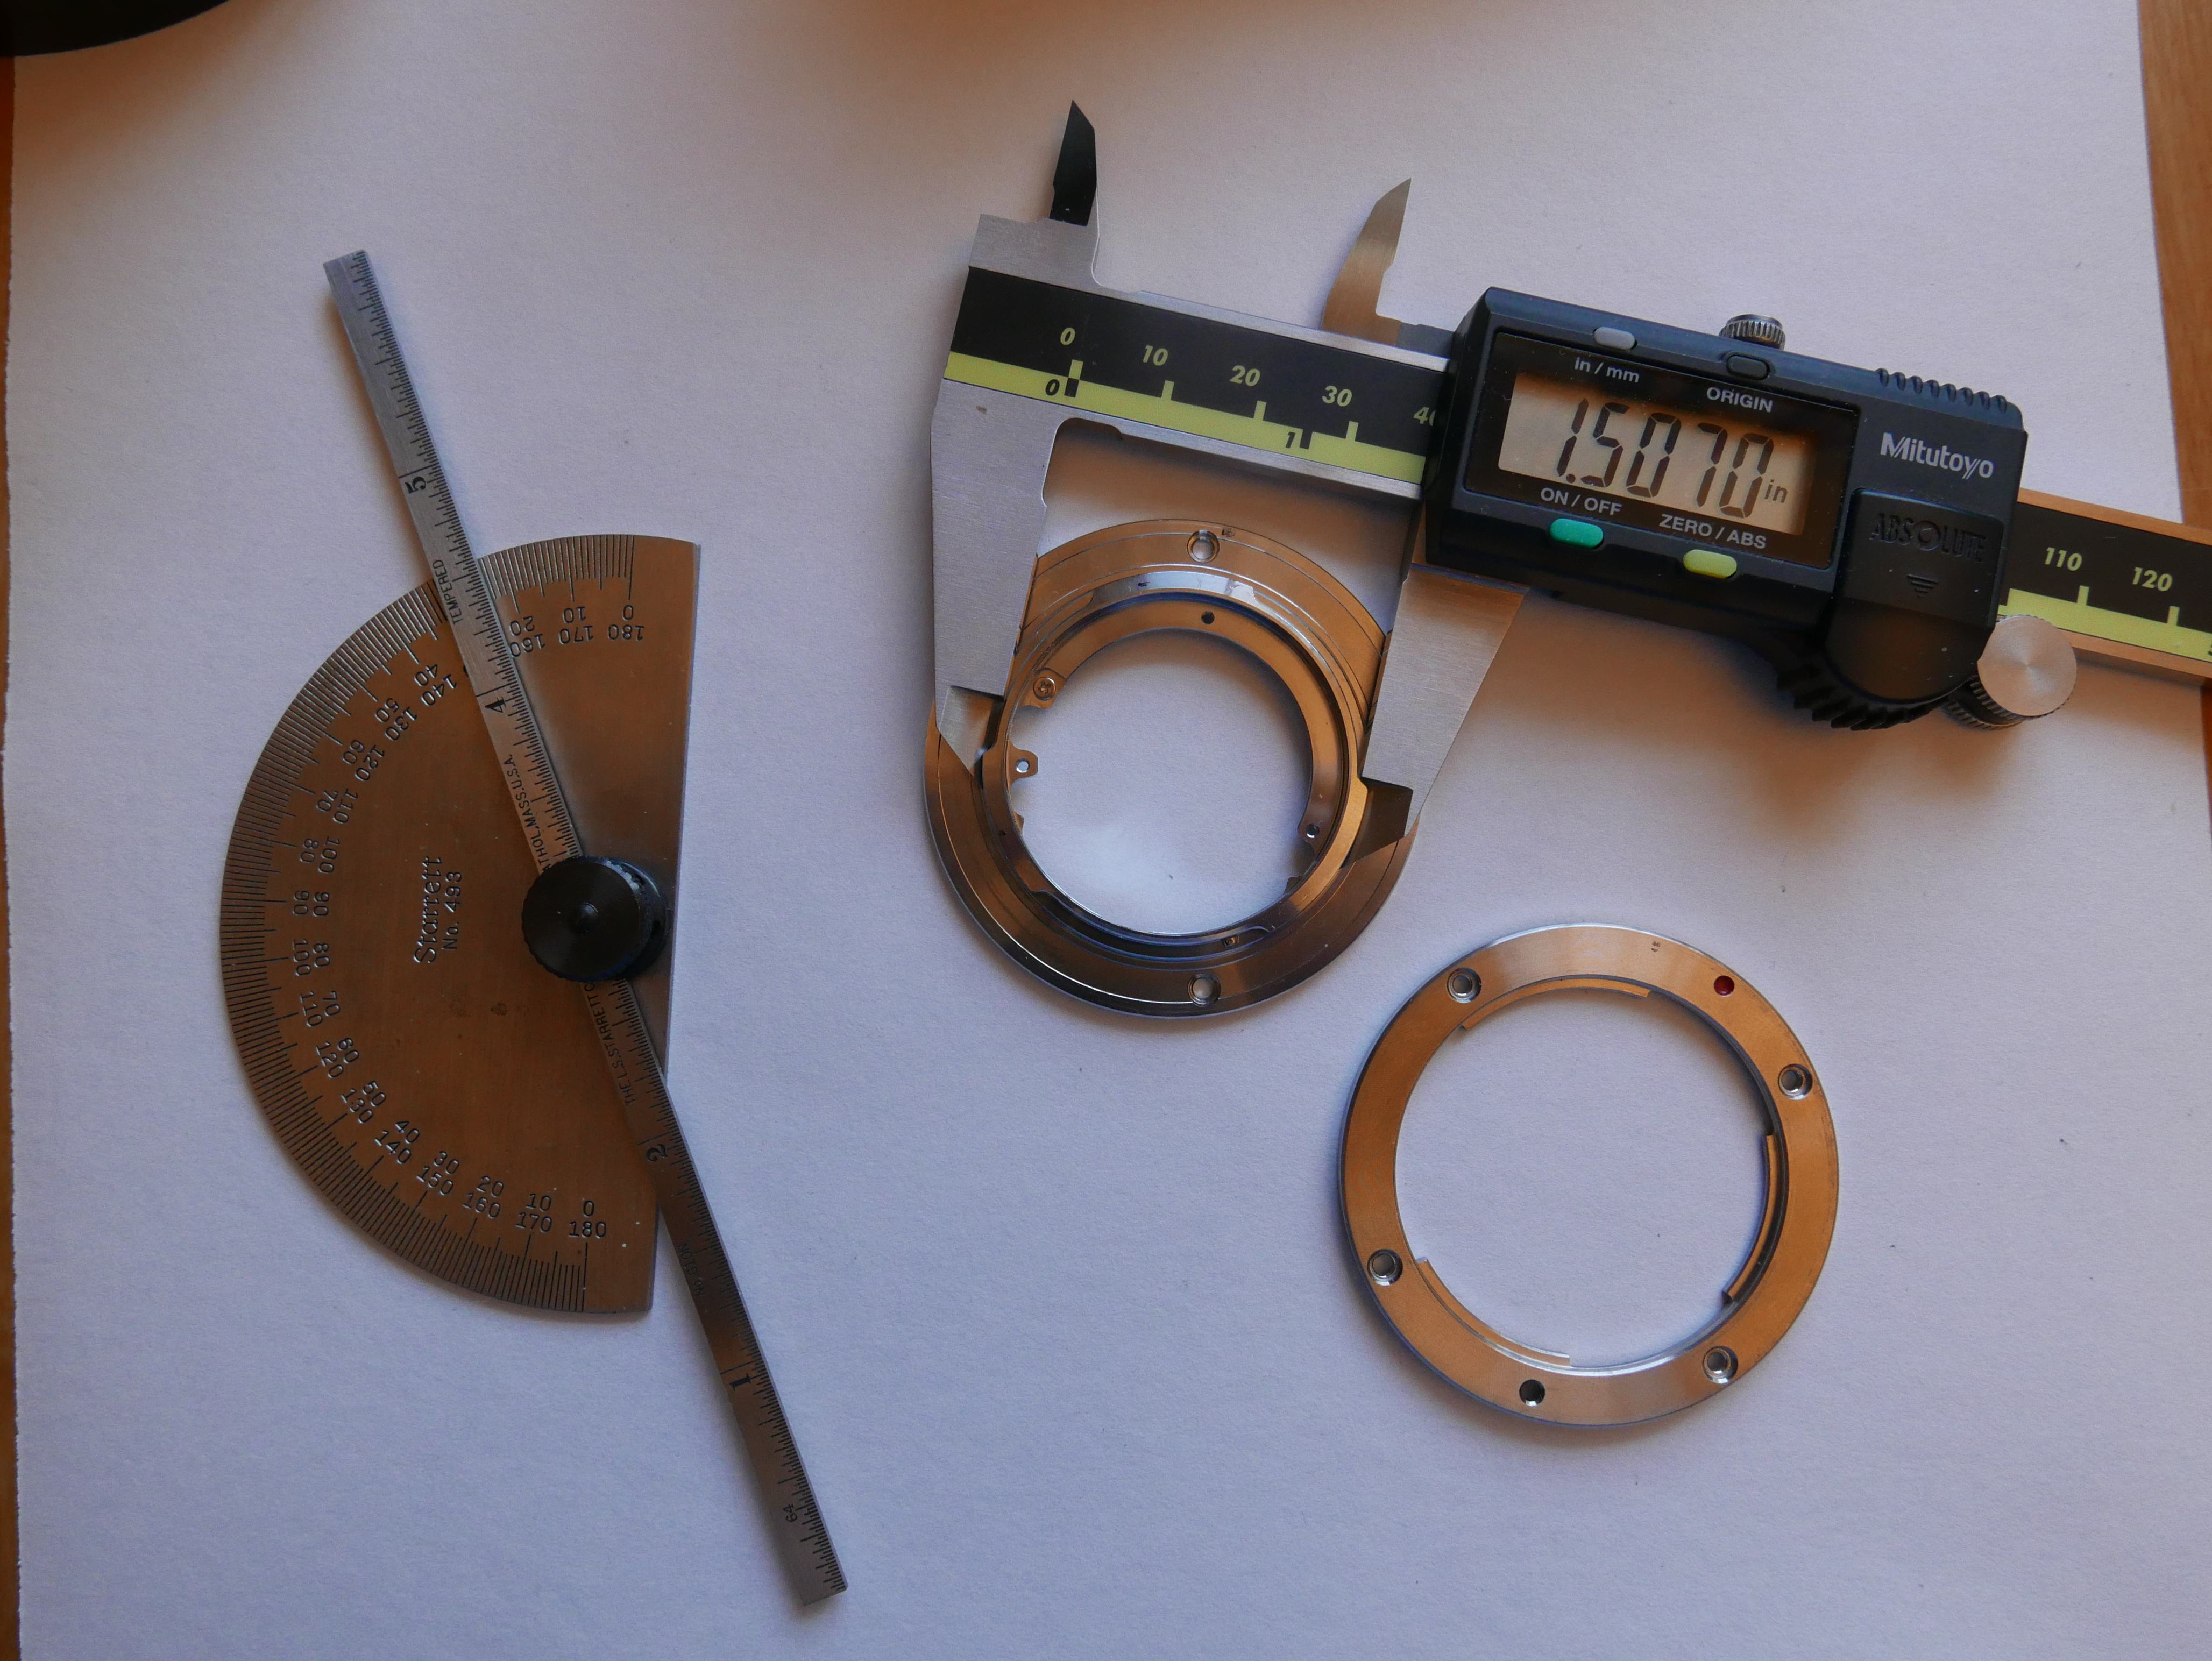
How did I get these measurements? Was there some magical fairy who came to me one night and whispered in my ear? did I have inside information from the Guardians of Mount Making®?
No, I used a Protractor, caliper, optical assistance, reference cameras and wit.
In case you were curious, that optical device is a lens set from a rear projection tv. Where can you get 3 sets of lenses that resolve 4x4in screens for free? That's right. Thank me next time there's one at the curb. Oh and that happens to be how I found out about those .1in chamfers and other extremely tiny geometry on the micro four thirds mount.
Some interesting notes about the Micro Four Thirds mount: I have noticed quite a variation in official Micro Four Thirds lens mounts. It seems that the thickness of the three flanged lobes that make up the mount are different per manufacturer. I am finding that Voigtlander/Cosina (49 thou) has a thicker flange than Panasonic (47 thou), Panasonic has a thicker flange than Olympus, and flanges on cheap third party mounts are about 41 thousandths thick and are not chamfered. Granted, heavier lenses may counteract the leverage placed on the mount by having a more rigid mount and thus thicker flanged lobes.
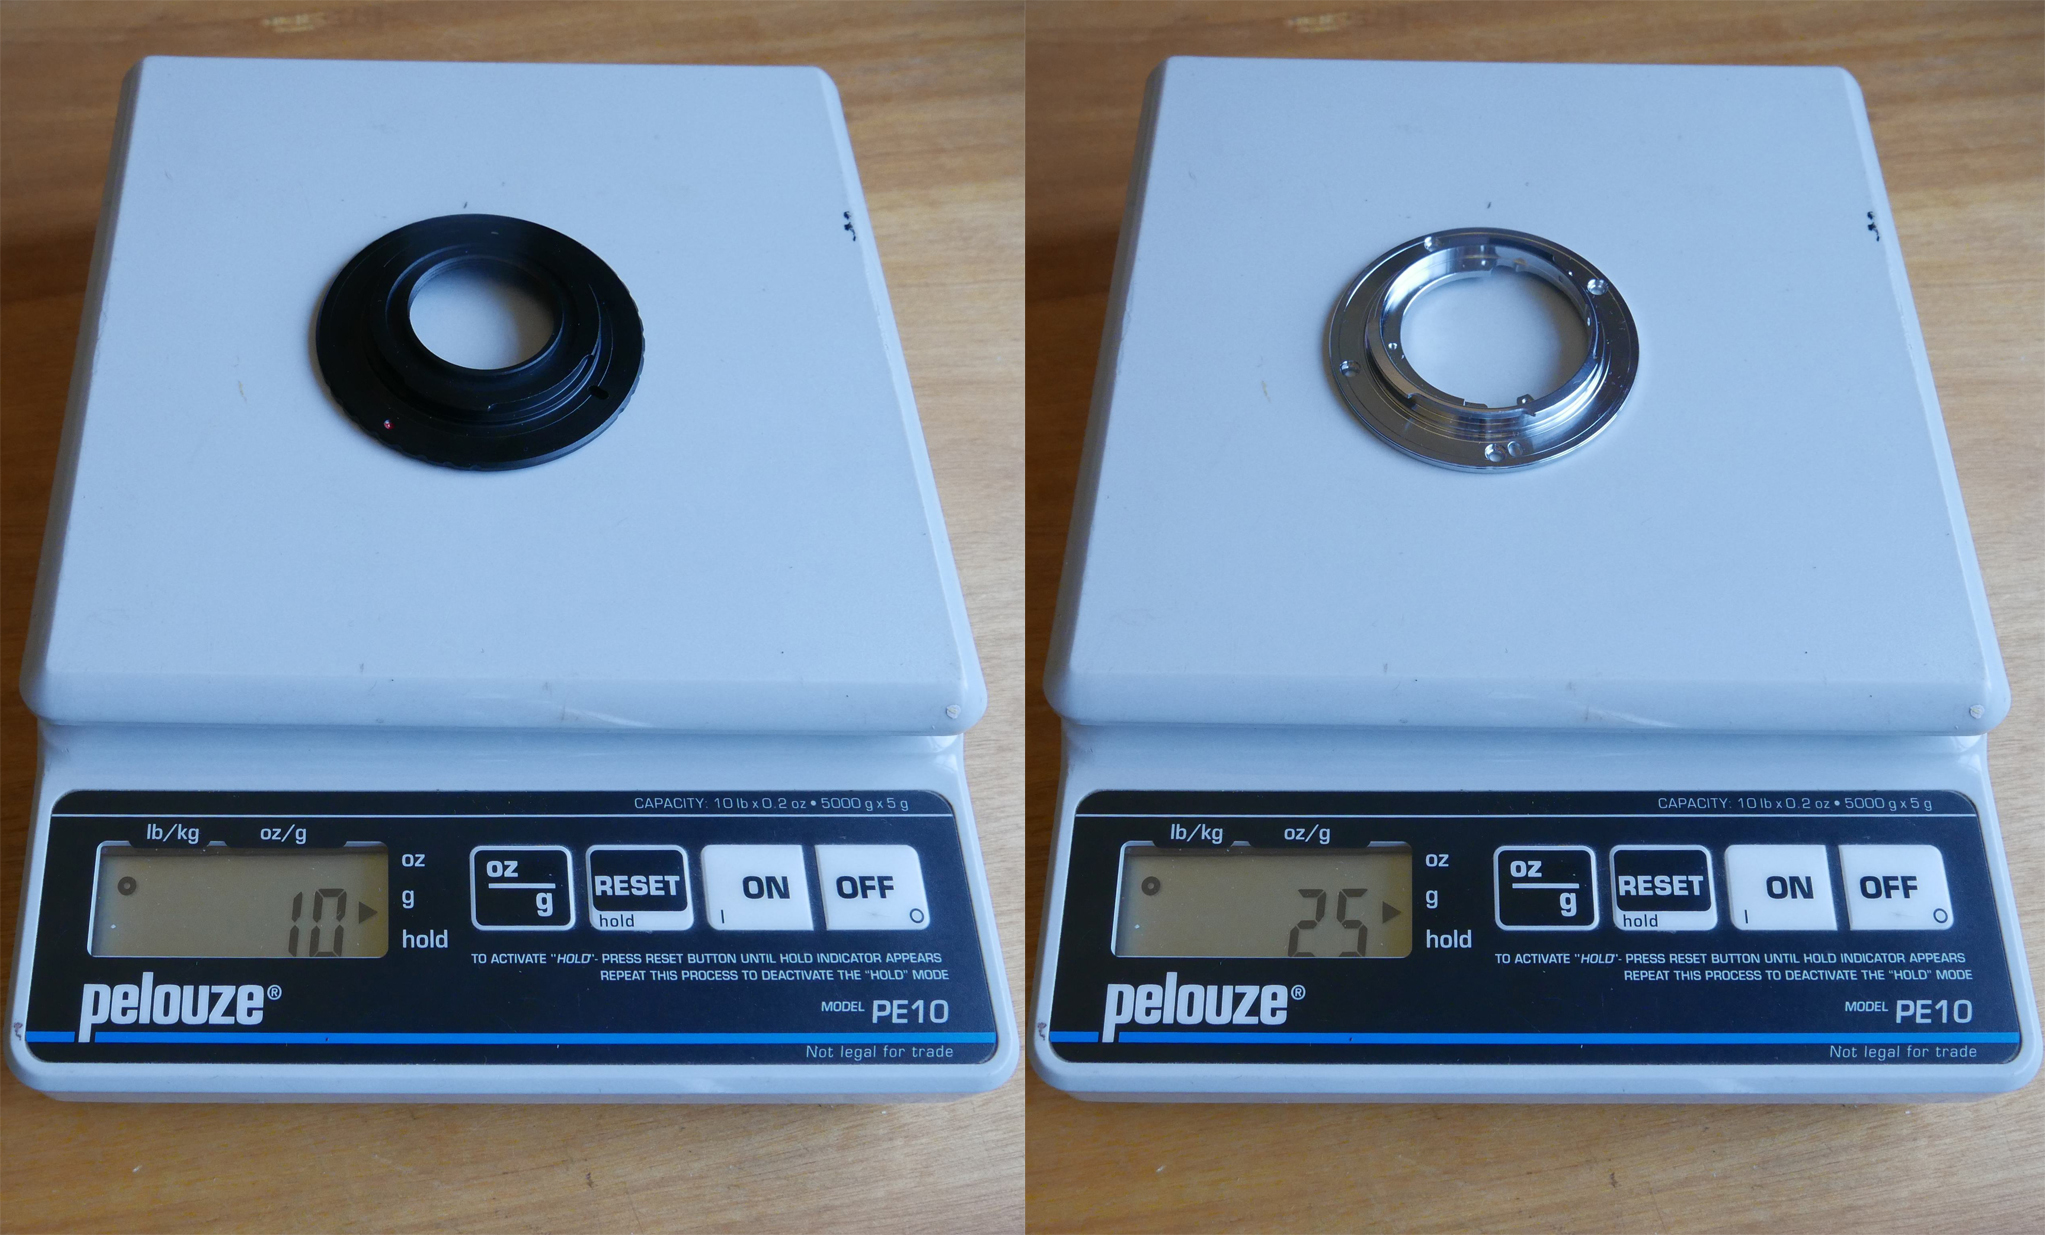
I did notice that the cheap c-mount adapter weighed about 10g, whereas the Panasonic mount weighed ~25g and consisted of far less material and volumetric space. In addition, it seemed that the Panasonic mount could hold an edge far better than the 3rd part c-mount adapter. I'll give you an example. When I finished the boring cut, my brother used his fingernail to debur the edge of the final cut. That is how soft the material is in the c-mount lens adapter! Doing that type of thing with normal grade steel or aluminum would sure spell out one cut up hand.
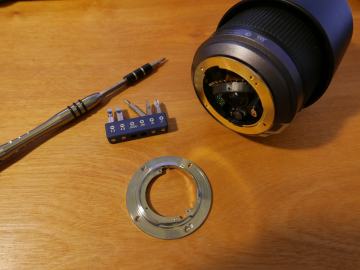
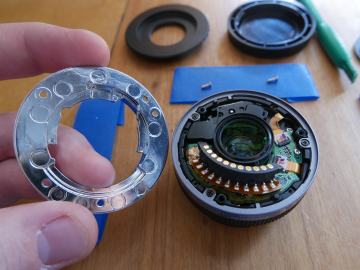
The bottom-most screw on the micro 4/3 lens mount, which is used to secure the 11 position electrical contact strip assembly, is co-linear to the red orientation dot on the exterior of the lens.
The overall outer diameter of u43 mount on weather-sealed lenses is smaller than traditional non-sealed lenses. This is to account for a small rubber o-ring which acts as the lens mount seal for the weather-sealed lens. Pretty nifty design change.
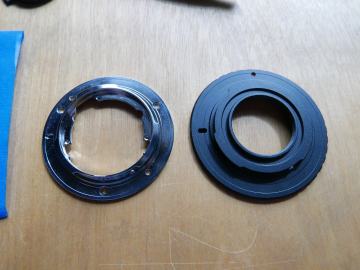
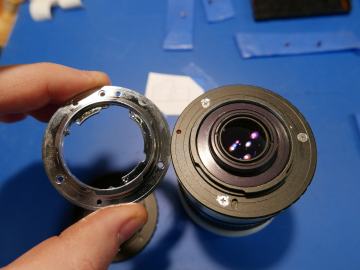
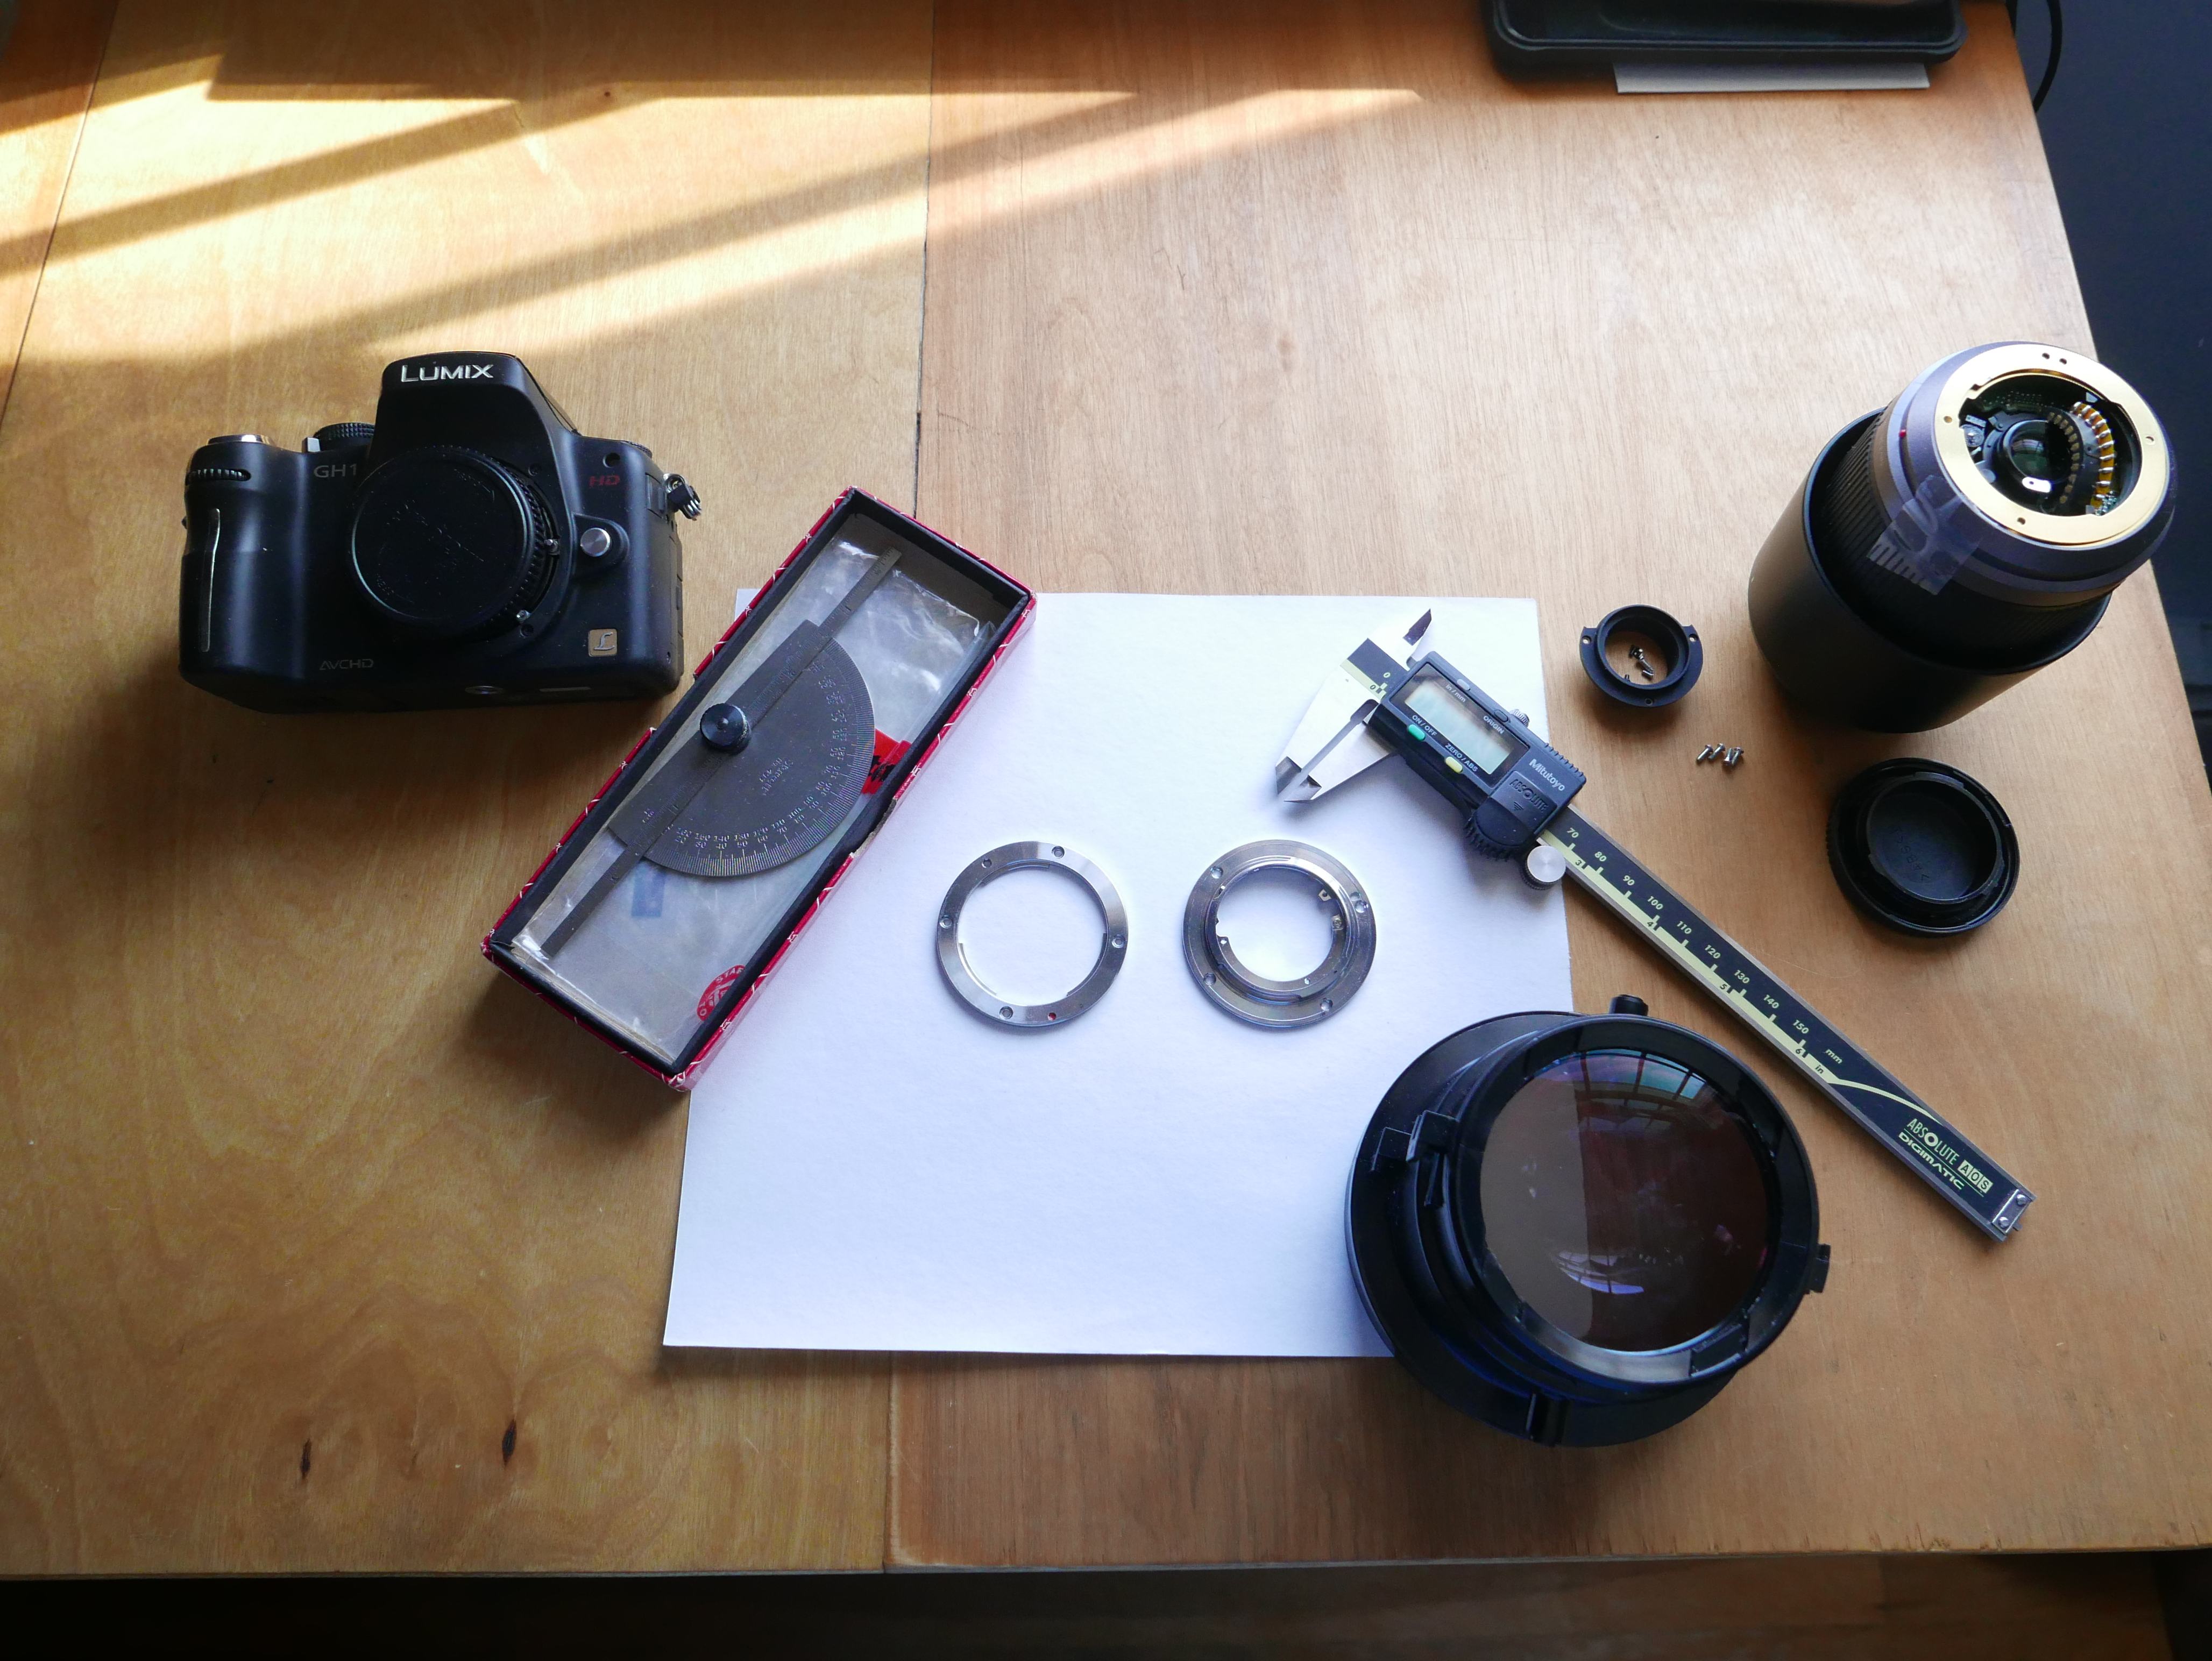
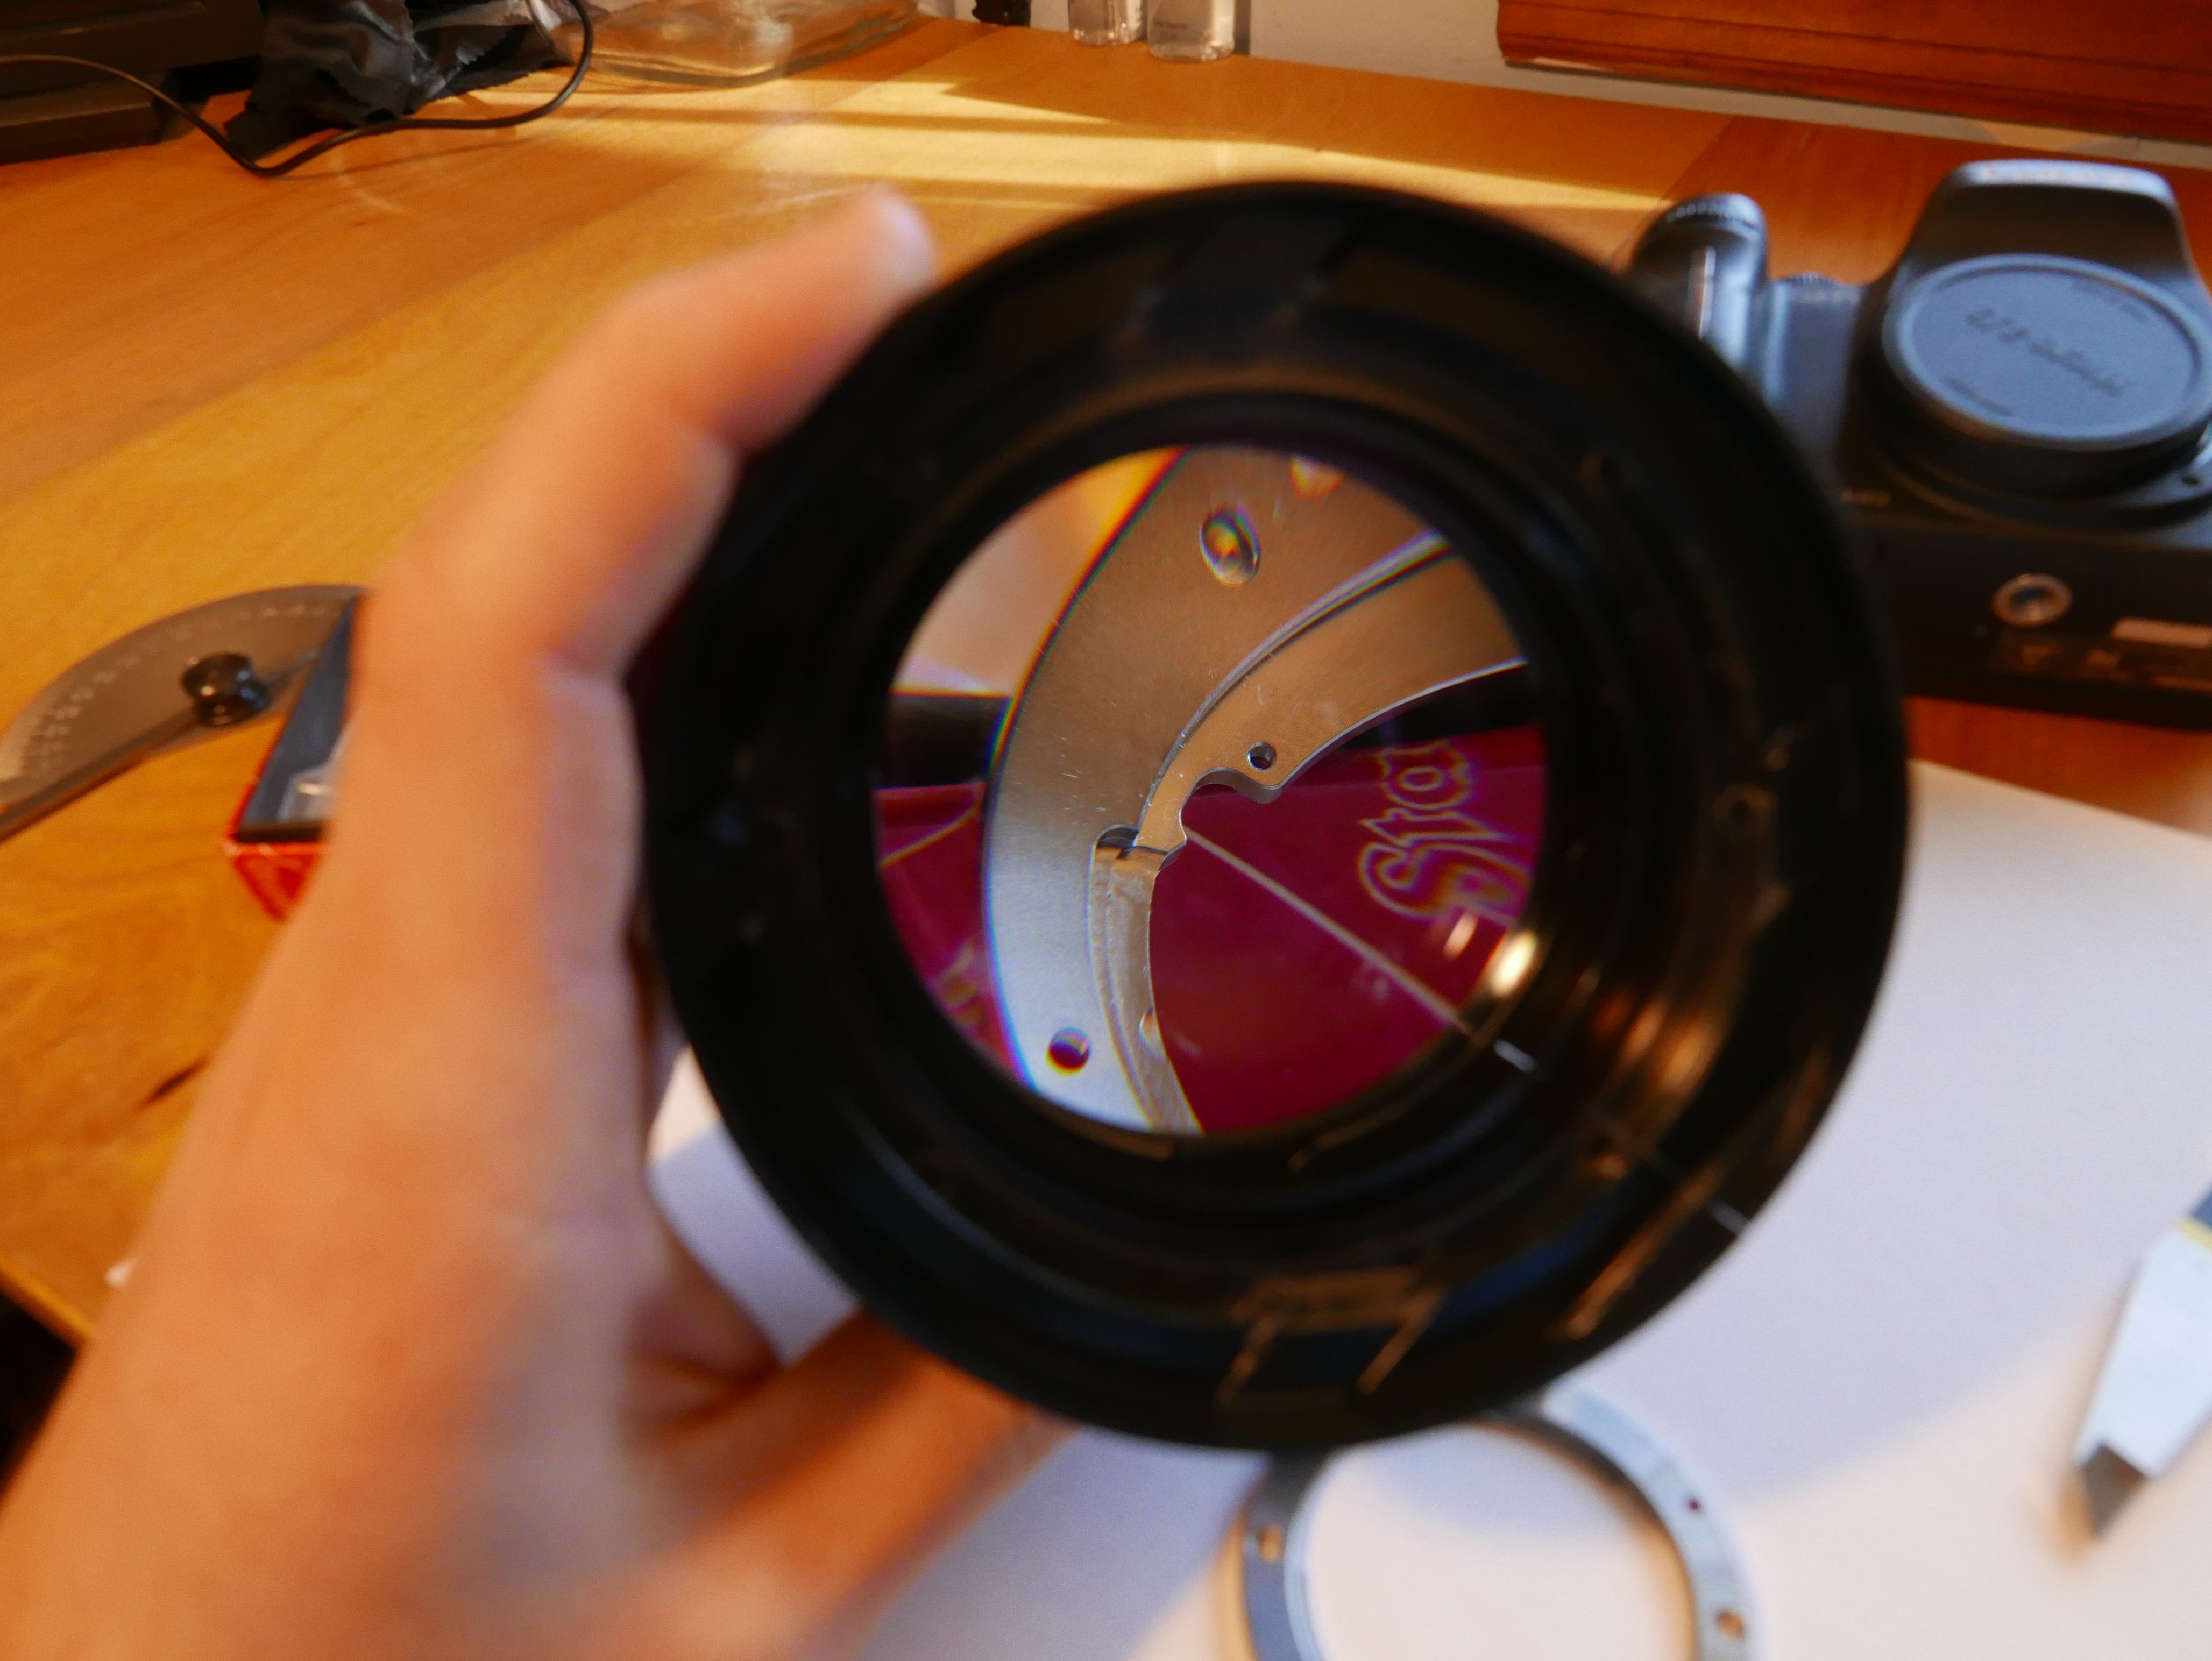
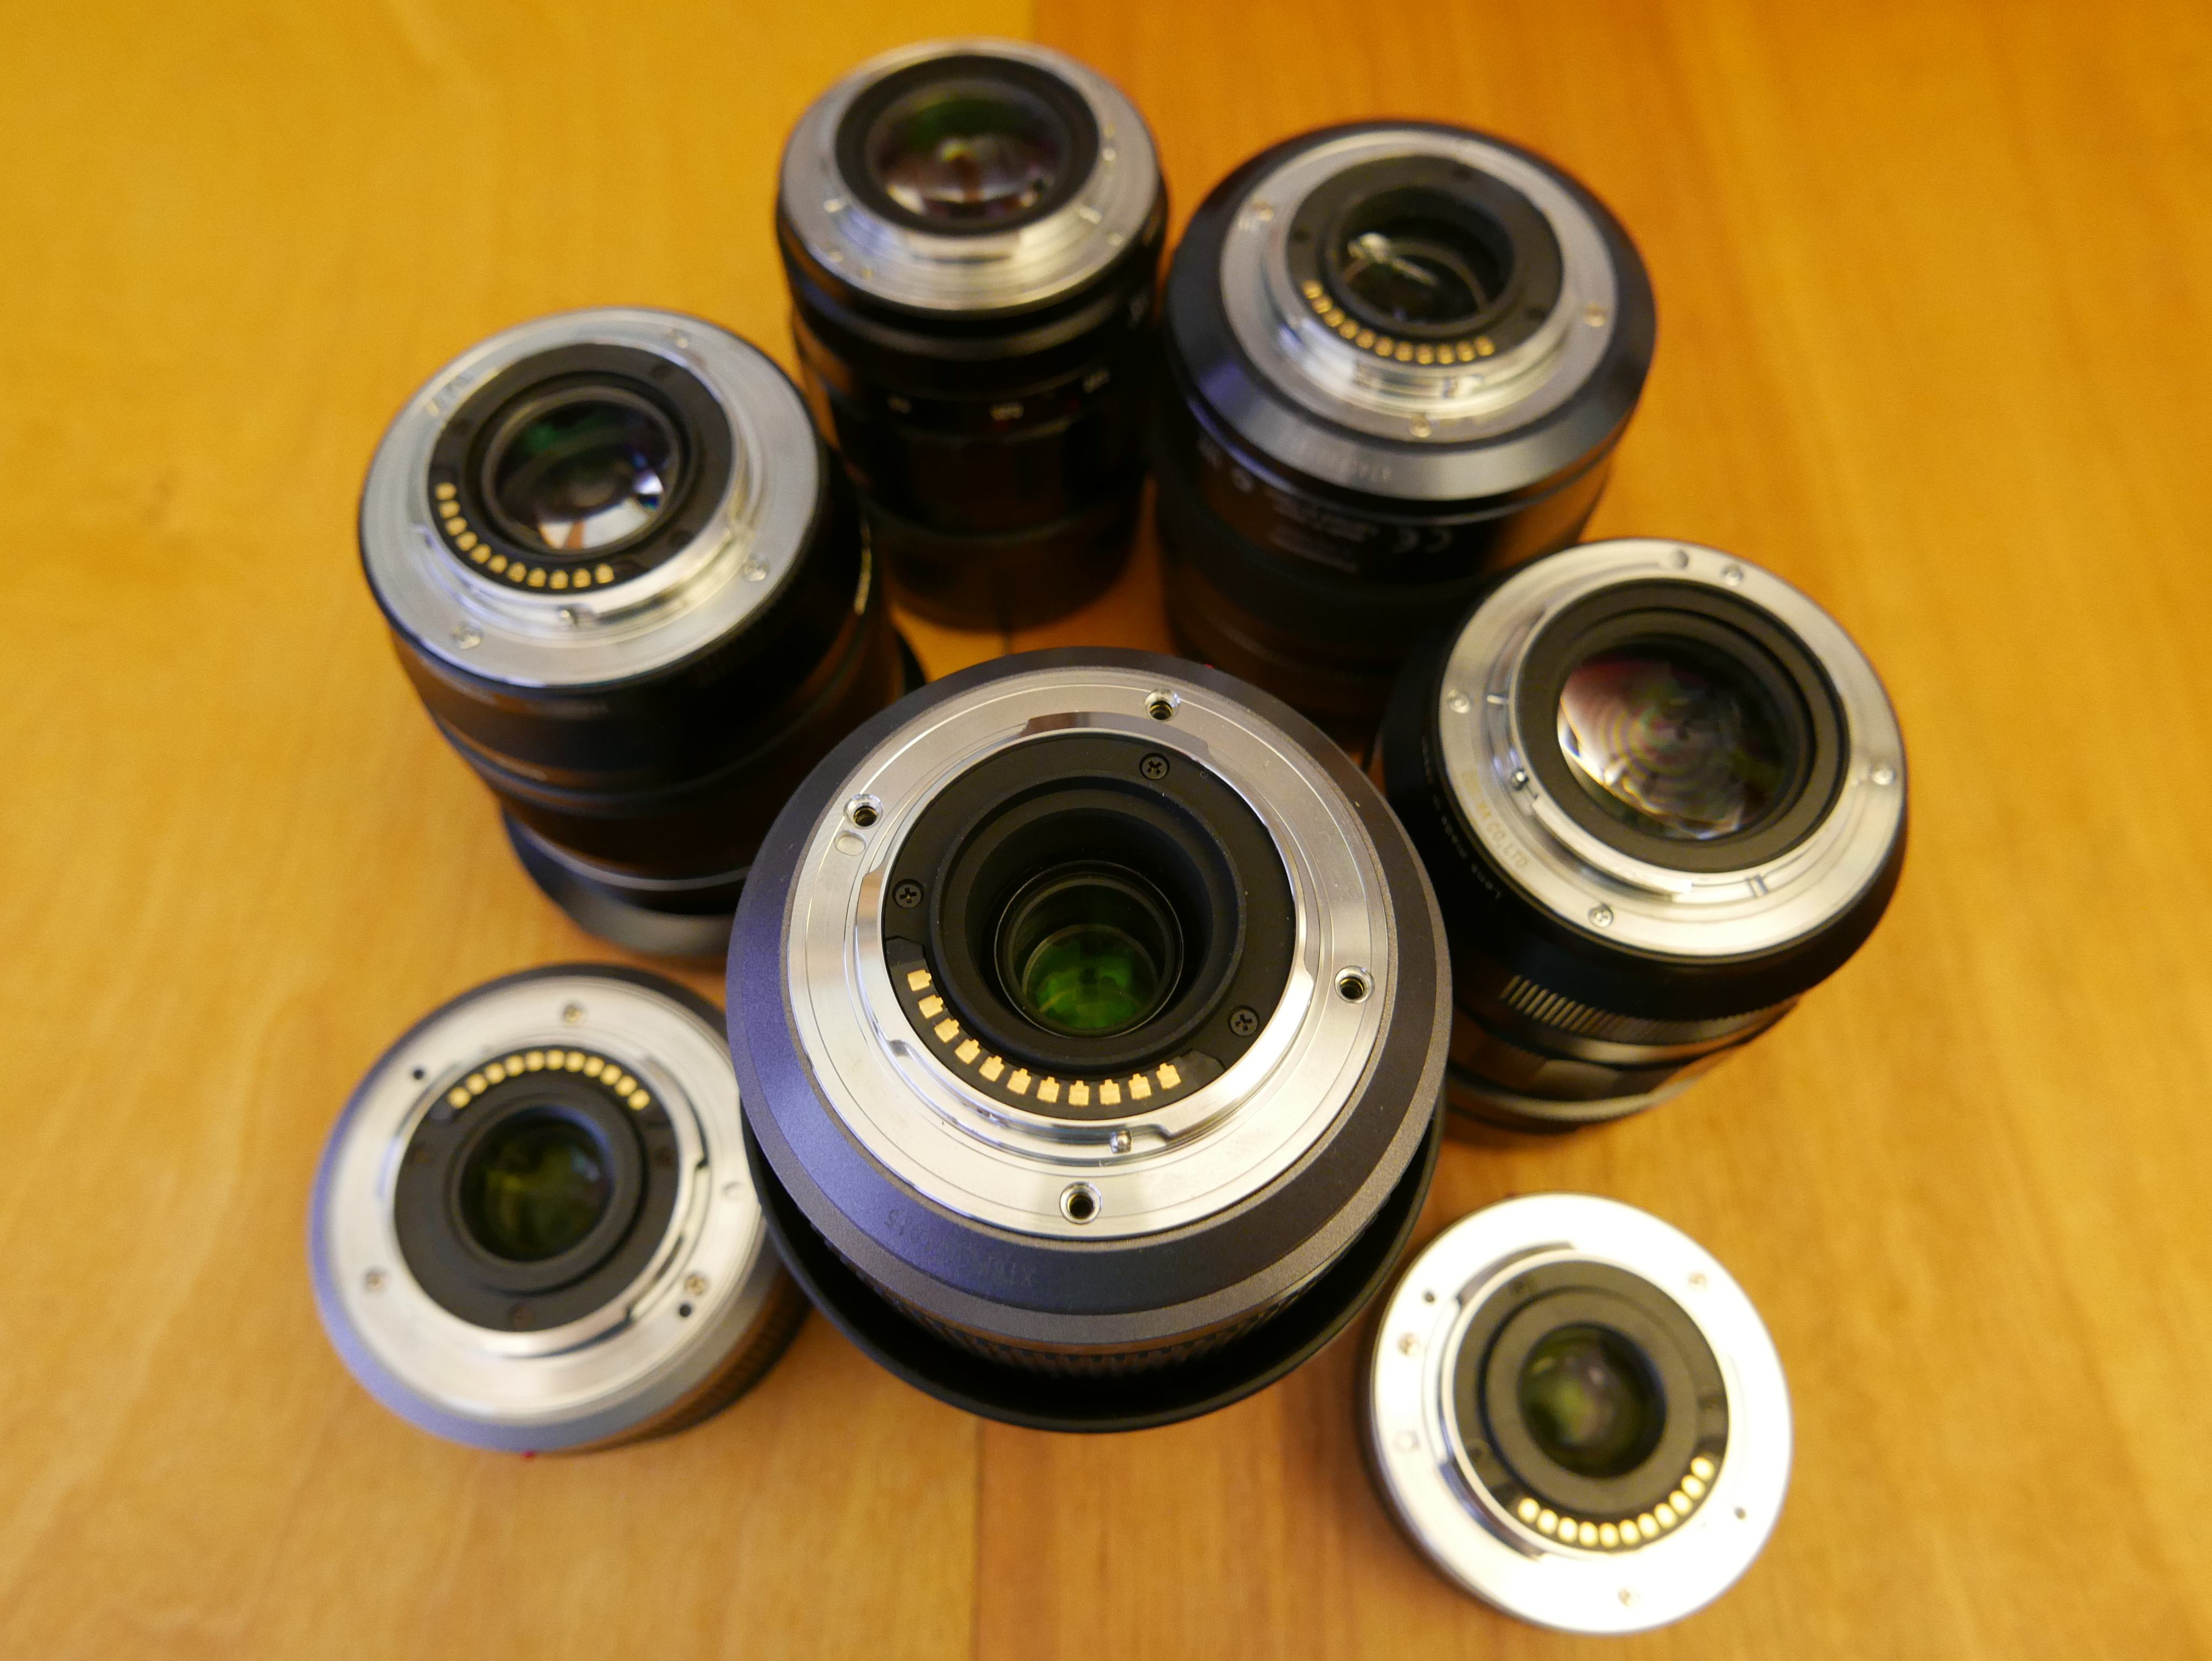
Want more? Here's a behind the scenes look at my workspace and some of the images that did not make the cut to be included in the write-up: